
Android上使用ZXing识别条形码与二维码的方法
这篇文章主要介绍了Android上使用ZXing识别条形码与二维码的方法,需要的朋友可以参考下
目前有越来越多的手机具备自动对焦的拍摄功能,这也意味着这些手机可以具备条码扫描的功能。手机具备条码扫描的功能,可以优化购物流程,快速存储电子名片(二维码)等。
本文所述实例就使用了ZXing 1.6实现条码/二维码识别。ZXing是个很经典的条码/二维码识别的开源类库,早在很久以前,就有开发者在J2ME上使用ZXing了,只不过需要支持JSR-234规范(自动对焦)的手机才能发挥其威力,而目前已经有不少Android手机具备自动对焦的功能。
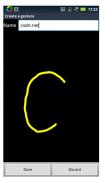
本文代码运行的结果如下,使用91手机助手截图时,无法截取SurfaceView的实时图像:


本文使用了ZXing1.6的core,即把/zxing-1.6/core/下的src复制覆盖工程的src;另外还要使用到/zxing-1.6/android/下的PlanarYUVLuminanceSource.java。
此处需要注意:/zxing-1.6/android/ 是BarcodeScanner的源码,本文程序相当于BarcodeScanner的精简版,只保留最基本的识别功能。
本文完整源码点击此处本地下载。
源码目录结果如下图,ChecksumException.java下面还有很多源文件,截图尚未列出:

本文例子必须要开摄像头和自动对焦的权限,不然启动时会报异常,所用的权限如下:
<uses-permission android:name="android.permission.CAMERA"></uses-permission>
<uses-permission android:name="android.permission.WRITE_EXTERNAL_STORAGE"></uses-permission>
<uses-feature android:name="android.hardware.camera" />
<uses-feature android:name="android.hardware.camera.autofocus" />
main.xml源码如下,main.xml必须要用到FrameLayout才能重叠控件实现“范围框”的效果:
<?xml version="1.0" encoding="utf-8"?>
<FrameLayout android:id="@+id/FrameLayout01"
 android:layout_width="fill_parent" android:layout_height="fill_parent"
 xmlns:android="http://schemas.android.com/apk/res/android">
 <SurfaceView android:layout_height="fill_parent"
 android:id="@+id/sfvCamera" android:layout_width="fill_parent"></SurfaceView>
 <RelativeLayout android:id="@+id/RelativeLayout01"
 android:layout_height="fill_parent" android:layout_width="fill_parent">
 <ImageView android:id="@+id/ImageView01"
  android:layout_height="100dip" android:layout_width="160dip"></ImageView>
 <View android:layout_centerVertical="true"
  android:layout_centerHorizontal="true" android:layout_width="300dip"
  android:background="#55FF6666" android:id="@+id/centerView"
  android:layout_height="180dip"></View>
 <TextView android:layout_centerHorizontal="true"
  android:layout_width="wrap_content" android:layout_below="@+id/centerView"
  android:layout_height="wrap_content" android:text="Scanning..."
  android:id="@+id/txtScanResult" android:textColor="#FF000000"></TextView>
 </RelativeLayout>
</FrameLayout>
testCamera.java是主类,负责控制Camera和对图像做解码,源码如下:
package com.testCamera;
import java.util.Timer;
import java.util.TimerTask;
import com.google.zxing.BinaryBitmap;
import com.google.zxing.MultiFormatReader;
import com.google.zxing.Result;
import com.google.zxing.Android.PlanarYUVLuminanceSource;
import com.google.zxing.common.HybridBinarizer;
import android.app.Activity;
import android.graphics.Bitmap;
import android.hardware.Camera;
import android.os.Bundle;
import android.view.SurfaceView;
import android.view.View;
import android.widget.ImageView;
import android.widget.TextView;
public class testCamera extends Activity {
 /** Called when the activity is first created. */
 private SurfaceView sfvCamera;
 private SFHCamera sfhCamera;
 private ImageView imgView;
 private View centerView;
 private TextView txtScanResult;
 private Timer mTimer;
 private MyTimerTask mTimerTask;
 // 按照标准HVGA
 final static int width = 480;
 final static int height = 320;
 int dstLeft, dstTop, dstWidth, dstHeight;
 @Override
 public void onCreate(Bundle savedInstanceState) {
 super.onCreate(savedInstanceState);
 setContentView(R.layout.main);
 this.setTitle("Android条码/二维码识别Demo-----hellogv");
 imgView = (ImageView) this.findViewById(R.id.ImageView01);
 centerView = (View) this.findViewById(R.id.centerView);
 sfvCamera = (SurfaceView) this.findViewById(R.id.sfvCamera);
 sfhCamera = new SFHCamera(sfvCamera.getHolder(), width, height,
  previewCallback);
 txtScanResult=(TextView)this.findViewById(R.id.txtScanResult);
 // 初始化定时器
 mTimer = new Timer();
 mTimerTask = new MyTimerTask();
 mTimer.schedule(mTimerTask, 0, 80);
 }
 class MyTimerTask extends TimerTask {
 @Override
 public void run() {
  if (dstLeft == 0) {//只赋值一次
  dstLeft = centerView.getLeft() * width
   / getWindowManager().getDefaultDisplay().getWidth();
  dstTop = centerView.getTop() * height
   / getWindowManager().getDefaultDisplay().getHeight();
  dstWidth = (centerView.getRight() - centerView.getLeft())* width
   / getWindowManager().getDefaultDisplay().getWidth();
  dstHeight = (centerView.getBottom() - centerView.getTop())* height
   / getWindowManager().getDefaultDisplay().getHeight();
  }
  sfhCamera.AutoFocusAndPreviewCallback();
 }
 }
 /**
 * 自动对焦后输出图片
 */
 private Camera.PreviewCallback previewCallback = new Camera.PreviewCallback() {
 @Override
 public void onPreviewFrame(byte[] data, Camera arg1) {
  //取得指定范围的帧的数据
  PlanarYUVLuminanceSource source = new PlanarYUVLuminanceSource(
   data, width, height, dstLeft, dstTop, dstWidth, dstHeight);
  //取得灰度图
  Bitmap mBitmap = source.renderCroppedGreyscaleBitmap();
  //显示灰度图
  imgView.setImageBitmap(mBitmap);
  BinaryBitmap bitmap = new BinaryBitmap(new HybridBinarizer(source));
  MultiFormatReader reader = new MultiFormatReader();
  try {
  Result result = reader.decode(bitmap);
  String strResult = "BarcodeFormat:"
   + result.getBarcodeFormat().toString() + " text:"
   + result.getText();
  txtScanResult.setText(strResult);
  } catch (Exception e) {
  txtScanResult.setText("Scanning");
  }
 }
 };
}
精彩图集

精彩文章